Preventive Maintenance for Reliable Trencher Performance
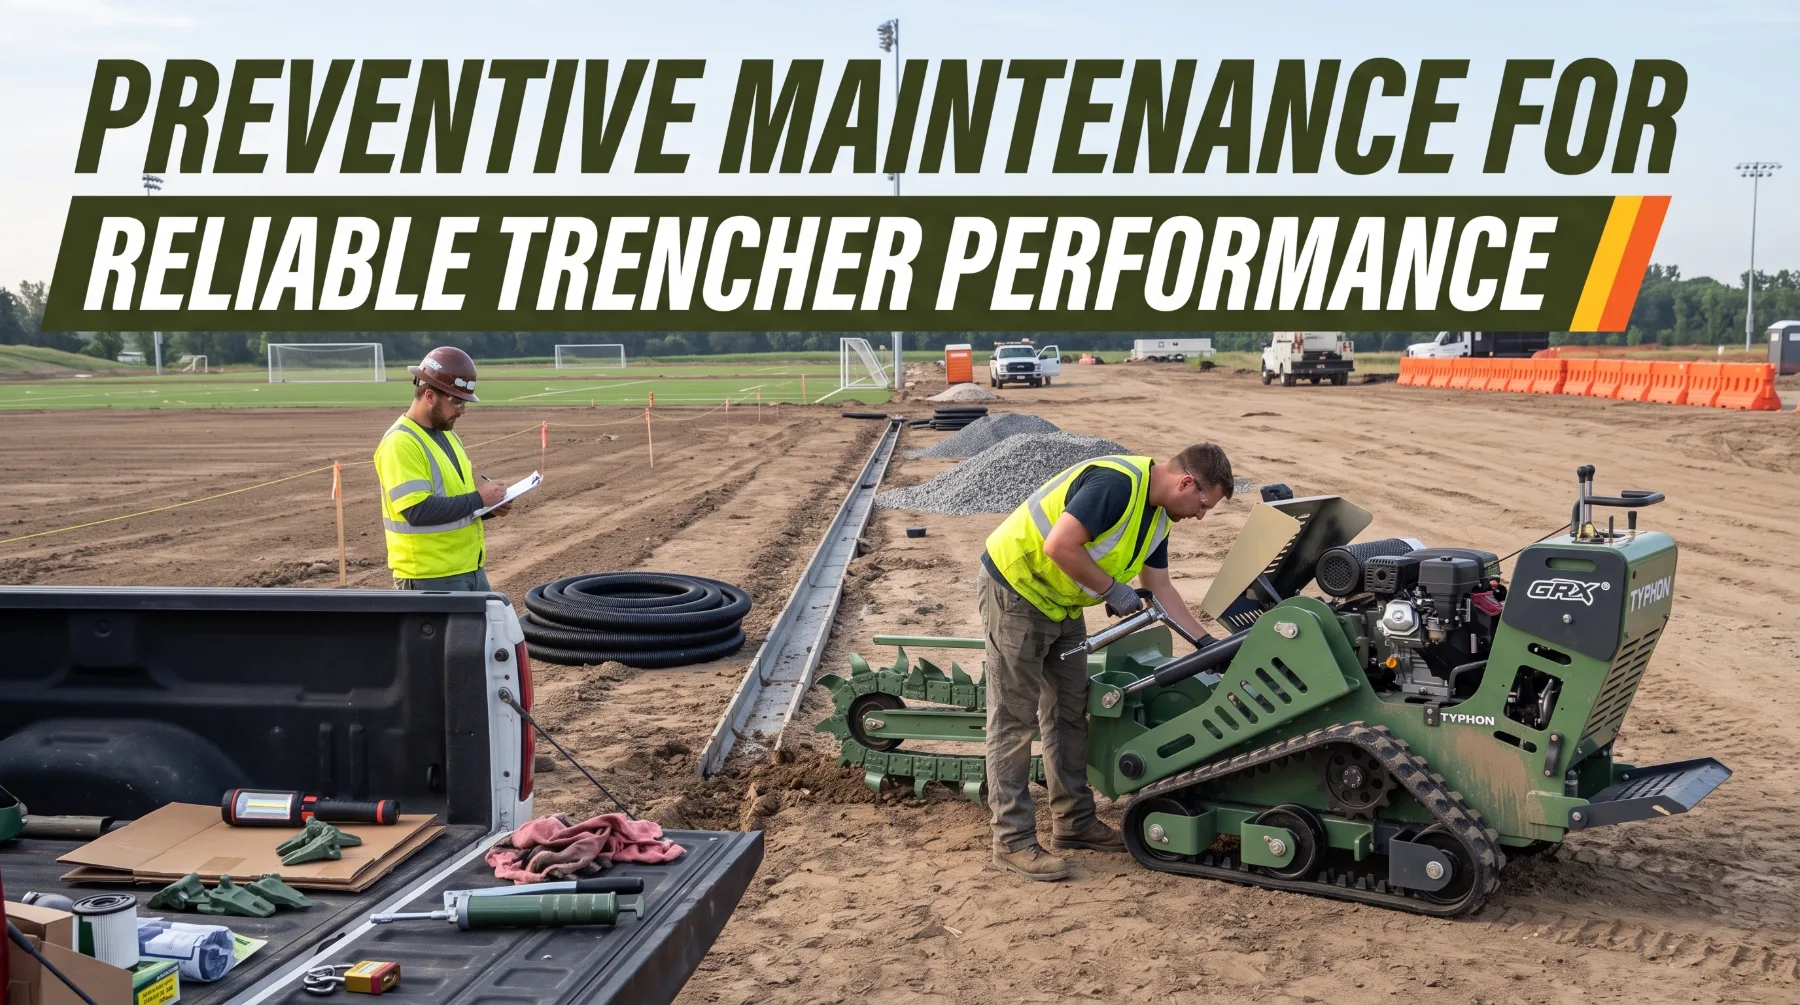
Trenchers operate under demanding conditions, cutting through soil, roots, and abrasive materials while handling repeated mechanical loads. Mud buildup, worn cutting components, neglected lubrication, and overdue fluid or filter changes can gradually reduce performance and lead to costly equipment failures. Preventive maintenance helps identify early signs of wear, preserve cutting efficiency, and reduce interruptions during drainage, irrigation, and utility projects.
The cutting chain, teeth, sprockets, boom, bearings, and auger components require regular attention because their condition directly affects trench quality and machine reliability. Engine oil, hydraulic fluid, filters, hoses, and fittings also need inspection according to the manufacturer's service intervals. Removing accumulated soil makes cracks, leaks, loose fasteners, and damaged parts easier to detect before they cause more extensive damage.
A consistent maintenance routine should include pre-shift inspections, cleaning and lubrication after operation, and scheduled servicing based on operating hours and manufacturer recommendations. Recording completed work and assigning clear responsibility for maintenance helps prevent missed service tasks when multiple operators share the machine. Replacing worn parts promptly and correcting leaks early can extend component life, maintain dependable trenching performance, and keep projects closer to schedule.
Engine and Power System Maintenance
The engine powers a trencher's travel, steering, cutting chain, and spoil auger. On many machines, it also drives the hydraulic pumps that operate these systems. When engine performance declines, several machine functions can suffer at once. Regular maintenance helps maintain the steady power required for demanding trenching work.
Check engine oil level and condition before every shift. Milky oil may indicate coolant contamination, while gritty or unusually dark oil can suggest filtration problems or overdue service. Change engine oil and oil filters at the intervals specified by the manufacturer, shortening service intervals for dusty or demanding conditions when recommended.
Trenching creates substantial dust, particularly in dry soil. A clogged air filter restricts airflow and reduces engine power. Check the restriction indicator daily and clean or replace the filter according to the manufacturer's schedule. Inspect intake hoses and clamps for cracks or looseness, since damaged connections can allow unfiltered air into the engine and cause premature wear.
Radiators and oil coolers can clog quickly during trenching operations. Blocked fins reduce heat transfer and may cause the engine to overheat. Check coolant only when the engine is cool, as opening a hot radiator cap can release pressurized coolant and cause severe burns. Clean cooler fins with compressed air according to the manufacturer's instructions, working from the clean side outward when appropriate for the design.
Use clean fuel from suitable containers, drain water separators as directed, and replace fuel filters on schedule. Contaminated fuel can cause rough running, power loss, and damage to fuel injection components.
Inspect drive belts for cracks, fraying, glazing, and incorrect tension. Slipping belts transfer less power and wear rapidly. Check battery terminals for corrosion and secure connections, and inspect wiring for damage where it passes near moving parts.
Monitor engine gauges throughout the shift. A steady engine sound under load, stable operating temperatures, and clear warning indicators suggest the engine is working within its normal range. Rising temperatures, warning lights, or sudden power loss require investigation before work continues.
Key Takeaway: Maintain engine oil, filters, cooling components, fuel systems, and belts according to the recommended schedule to preserve dependable power for travel, cutting, and other machine functions.
Cutting Chain and Teeth Inspection
The cutting chain and teeth handle constant contact with soil, rocks, and roots, making them prone to wear and damage. Regular inspections help maintain cutting performance, reduce machine strain, and prevent costly repairs.
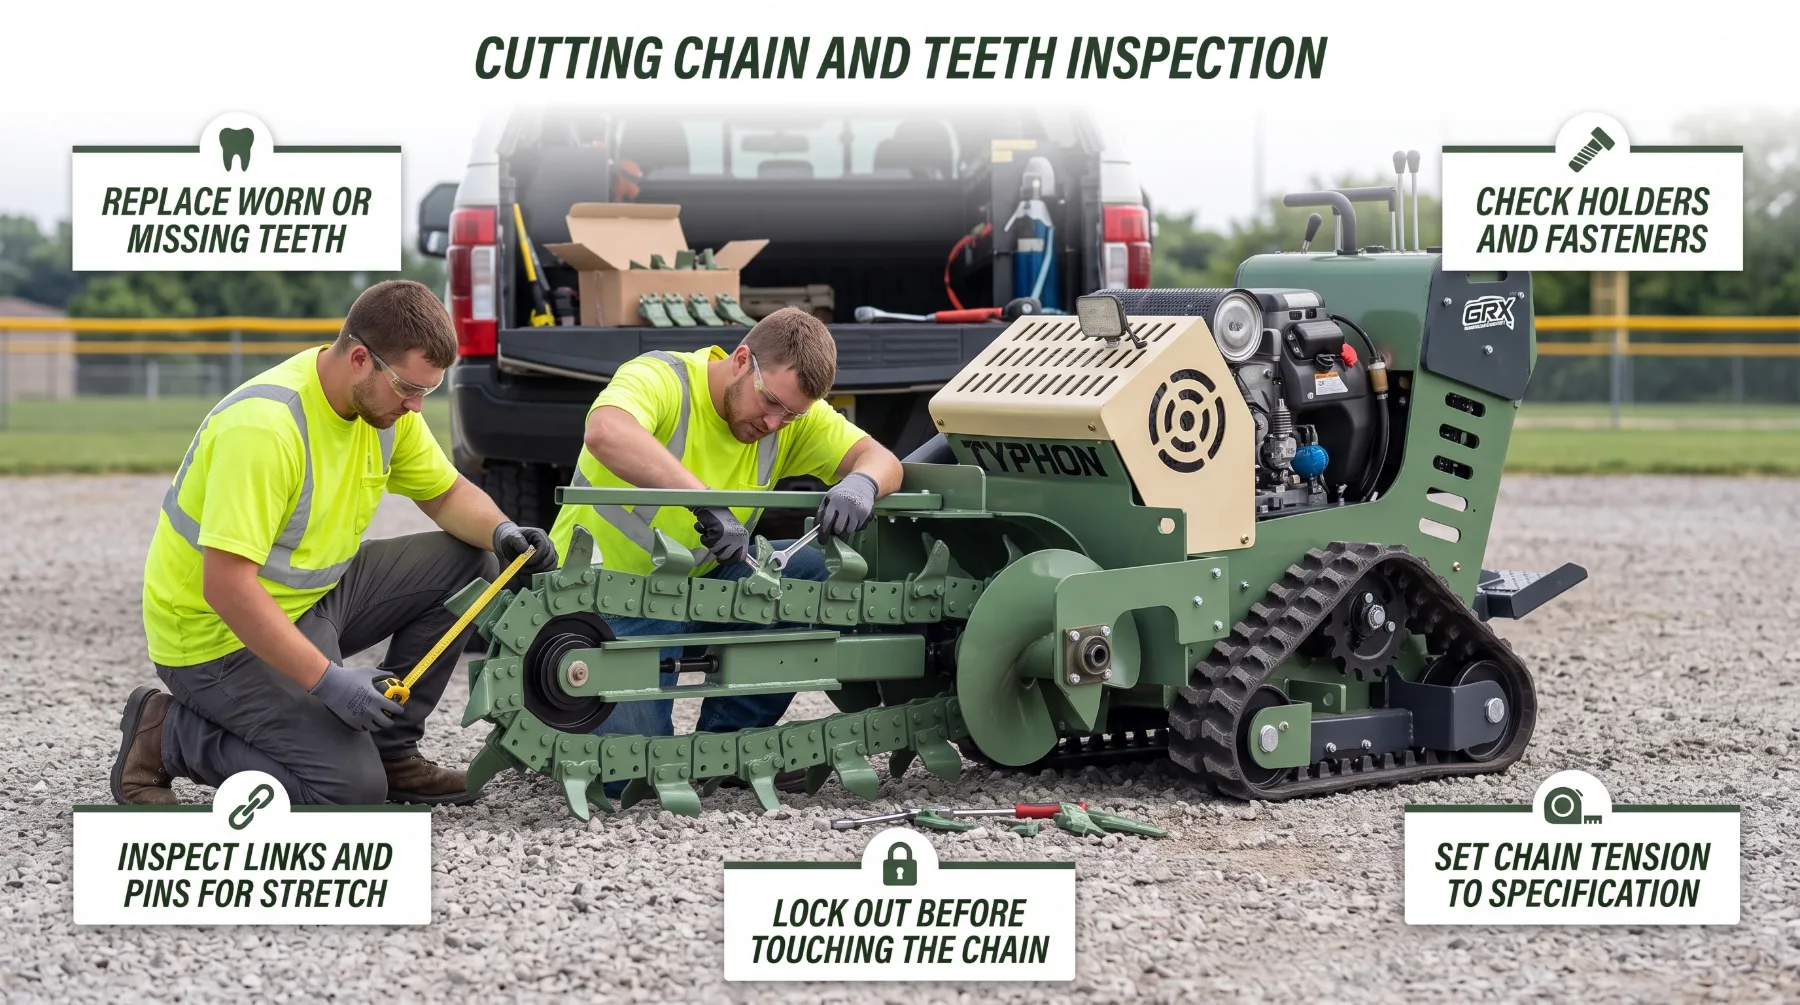
- Tooth Condition: Check for worn, chipped, cracked, or missing teeth. Replace damaged teeth promptly to maintain efficient and even cutting.
- Holders and Fasteners: Confirm teeth are firmly secured and bolts, pins, and retainers are present. Inspect holders and mounting points for cracks or damage.
- Chain Condition: Look for cracked links, bent sections, damaged welds, and excessive movement between links and pins. Replace chains that have worn beyond their adjustment limits.
- Chain Tension: Adjust tension according to the manufacturer's instructions. A loose chain may jump the sprocket, while excessive tension increases wear on the chain, sprockets, and bearings.
- Safe Inspection and Maintenance: Shut down the engine, remove the key, lower the boom, and follow the lockout procedure before working near the chain. Handle tension adjusters carefully and keep suitable spare teeth and fasteners available.
Key Takeaway: Inspect the cutting chain and teeth for wear, damage, loose connections, and incorrect tension according to the manufacturer's instructions. Worn cutting components reduce productivity and increase strain on the entire machine.
Hydraulic System Checks
Many trenchers rely on hydraulics to drive the cutting chain, raise and lower the boom, steer, and propel the machine. Hydraulic systems operate under high pressure, and their hoses flex as the boom moves. A damaged hose, loose fitting, or contaminated fluid can reduce chain speed, slow boom movement, and create a serious hazard if a component fails under pressure.
Check hydraulic fluid at the sight glass or dipstick according to the manufacturer's procedure, with the boom positioned as specified. Examine the fluid's condition as well as its level. Cloudy or foamy fluid may indicate water or air contamination, while dark fluid with a burnt odor can suggest overheating. Use only the recommended hydraulic fluid and keep storage containers clean and clearly labeled.
Inspect visible hoses for cracks, abrasion, bulges, and kinks. Pay particular attention to areas where hoses bend near the boom pivot, pass close to the chain, or rub against the frame. Check fittings for dampness, oily residue that attracts dust, and loose connections. Use protective sleeves where appropriate and replace damaged hoses with parts rated for the system.
Examine boom lift and steering cylinder rods for scoring, nicks, pitting, and bends. A damaged rod can wear cylinder seals during every stroke. Fresh oil or a dark, dust-covered ring around a cylinder gland may indicate a leak. A boom that drifts when the controls are in neutral can also point to worn internal seals or another hydraulic fault.
Inspect chain drive and travel motors for leaks around their seals and fittings. Listen for unusual whining or knocking during operation. On trencher attachments for compact equipment, examine quick couplers for damage and worn seals. Wipe couplers clean before connecting them, and keep protective caps in place when the attachment is disconnected.
Replace hydraulic filters at the manufacturer's recommended intervals and keep the oil cooler clean. Monitor hydraulic temperature during demanding cuts and stop to investigate if temperatures approach the warning range.
Never use bare hands to search for hydraulic leaks. Pressurized fluid can penetrate the skin and cause serious injuries requiring immediate medical attention. Use cardboard or wood to help identify a leak from a safe position, and wear suitable gloves and eye protection. Before loosening fittings or disconnecting hoses, lower the boom to the ground and relieve system pressure according to the manufacturer's procedure.
Key Takeaway: Inspect hydraulic hoses, fittings, cylinders, motors, and connections for leaks or damage. Maintain clean fluid at the correct level and always use cardboard, never bare hands, to locate suspected leaks.
Sprockets, Bearings, and Moving Parts
Sprockets, bearings, rollers, and other moving components keep the cutting chain turning, the boom pivoting, and the spoil auger clearing material. These parts carry heavy loads while exposed to dirt and debris. Wear or inadequate lubrication can cause rapid failure and damage connected components, as the sports complex crew learned.
Inspect drive sprocket teeth for hooked, pointed, or thinned tips that indicate advanced wear. A worn sprocket engages the chain poorly, accelerates chain wear, and may cause the chain to jump. Because chains and sprockets wear together, follow the manufacturer's guidance on replacing them as a matched set. Check idler sprockets or rollers at the end of the boom for wear, flat spots, and restricted rotation.
Bearings at the head shaft, boom tail, and spoil auger operate under heavy loads and constant exposure to contamination. Look for grease leaking past damaged seals, discolored paint that may indicate excessive heat, and looseness around bearing housings. With the machine shut down, safely locked out, and all components stopped, gently check accessible shafts for excessive play. During operation, listen from a safe position for grinding, squealing, or rumbling. Never touch a bearing housing immediately after operation to check its temperature, as it may be hot enough to cause burns.
Inspect boom rollers, wear strips, the boom pivot, steering linkage, and spoil auger flighting for wear, cracks, and loose hardware. On tracked trenchers, check track tension, rollers, idlers, and drive sprockets for damage, wear, and material buildup.
Grease all fittings according to the manufacturer's schedule, using the specified grease type. In muddy, dusty, or heavy-duty conditions, increase lubrication frequency only when permitted by the manual. Wipe each fitting clean before connecting the grease gun to prevent dirt from entering the bearing. Replace blocked or damaged grease fittings rather than skipping them. Check gearbox and chain case oil levels where applicable, and change the oil at the specified intervals.
Pay attention to changes in sound, vibration, and machine behavior. New noises can be early signs of component wear, and identifying the cause promptly may prevent a minor repair from developing into a major breakdown.
Key Takeaway: Inspect sprockets, bearings, rollers, and other moving parts for excessive wear, looseness, unusual noise, or overheating. Lubricate components according to the manufacturer's requirements to reduce friction and maintain reliable operation.
Cleaning and Debris Removal
Trenching generates soil, clay, roots, stones, and other debris that can accumulate around the cutting assembly, boom, spoil auger, and undercarriage. Buildup can hide cracks and leaks, cover grease fittings, trap moisture against metal surfaces, and increase resistance around moving parts. Dry roots, grass, and debris near hot engine components can also create a fire hazard.
Clean the machine at the end of each shift while accumulated material is still relatively easy to remove. Before cleaning, park on firm, level ground, lower the boom, engage the parking brake where equipped, shut off the engine, remove the key, and follow the manufacturer's lockout procedure. Wait until the chain, auger, and all other moving components have stopped completely. Never remove material from the chain or auger while the engine is running.
Remove packed soil from the chain, teeth, boom, and sprockets using an appropriate scraper or bar, never your hands. Clear roots and wire wrapped around chains or shafts because they increase drag and can damage seals. Clean the spoil auger flighting so excavated material can discharge properly during the next shift.
Remove packed mud, clay, and stones from tracks or wheel areas, rollers, and drive components. Hardened buildup can affect track tension and may force a track off its guides.
Clear debris from the engine compartment and belly pan, and clean radiator and cooler screens with compressed air according to the manufacturer's instructions. Wear eye protection when using compressed air to remove dust and debris.
Wipe grease fittings clean so they are ready for the next service. Remove mud from steps, handholds, and the operator platform to reduce slip hazards and maintain safe access.
Use only approved cleaning methods. Avoid directing high-pressure water at close range toward seals, bearings, and electrical components, as water can pass through seals and contaminate protected areas. Follow the manufacturer's guidance on which components may be washed and which require hand cleaning or compressed air.
Cleaning also makes inspections more effective. Cracks, leaks, and worn teeth that remain hidden beneath packed mud become easier to identify on a clean machine. Combining end-of-shift cleaning with a brief walkaround helps crews find problems and arrange repairs before the next workday.
Key Takeaway: Remove soil, roots, stones, and other debris using approved procedures after safely shutting down and securing the trencher. Clean components are easier to inspect and less likely to suffer damage or interference from accumulated material.
Scheduled Service and Maintenance Records
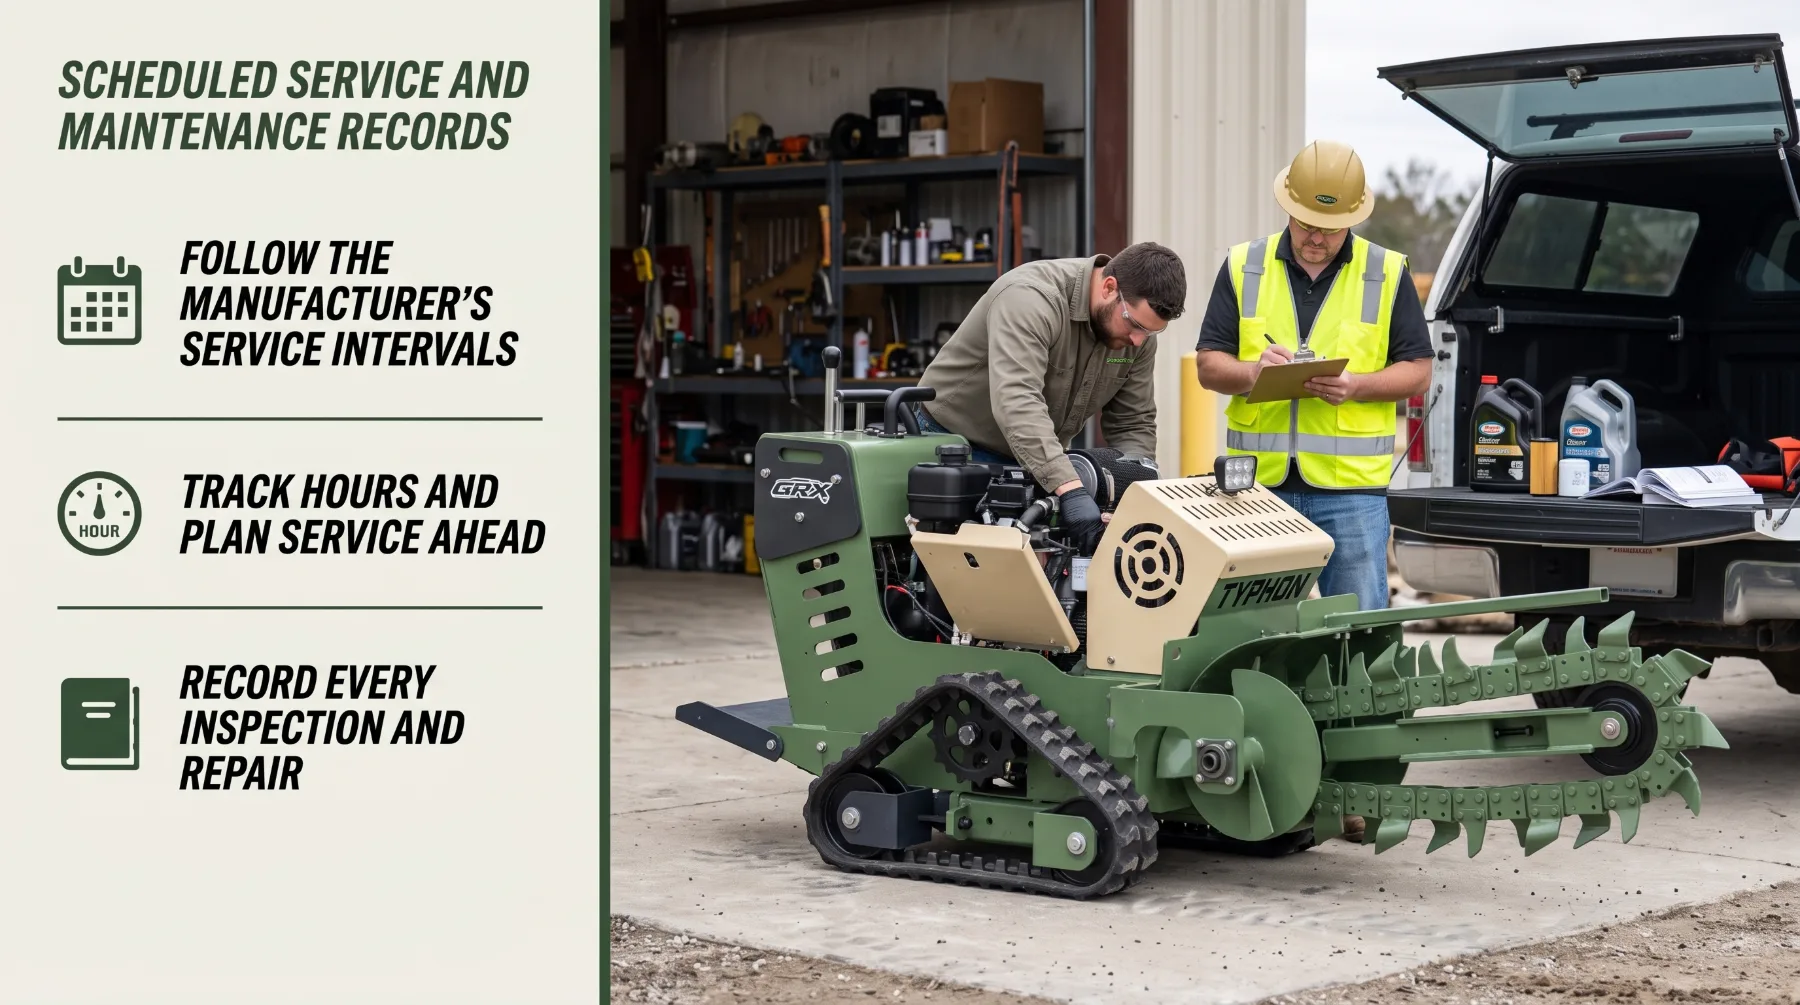
Daily inspections help identify visible problems, while scheduled servicing addresses wear that may not be apparent during a walkaround. Both are essential for keeping a trencher dependable throughout its working life. The manufacturer's maintenance schedule, usually based on operating hours, determines when each service task should be completed.
Follow the manufacturer's intervals for lubricating bearings and pivots, changing engine oil and other specified fluids, replacing air, fuel, oil, and hydraulic filters, adjusting the chain, and checking chain stretch. Replace teeth, chains, sprockets, bearings, belts, and hoses when they reach specified wear limits or service intervals.
Use the hour meter to track operating time and schedule maintenance before service intervals are exceeded. When possible, plan major servicing between projects or during weather delays so repairs do not interfere with deadlines. Keep common wear parts in stock, including teeth, fasteners, filters, and grease, to avoid unnecessary waiting for parts. Leave major repairs to qualified technicians and use replacement parts that meet the manufacturer's specifications.
Maintenance records provide a clear history of the machine's condition. Record each inspection, adjustment, fluid change, part replacement, and repair, including the date and hour meter reading. Keep the log in a weather-resistant holder on the machine or in a digital system accessible to the crew. When several operators share the trencher, a common record helps prevent missed service tasks caused by assumptions that someone else completed the work.
Reviewing service history can reveal recurring problems. Unusually fast tooth wear may indicate that a different cutting system is needed for certain ground conditions. Repeated hose failures may suggest poor routing or inadequate protection, while recurring bearing problems may require further investigation of lubrication or operating conditions. Maintenance records also support warranty requirements and help with parts planning and repair budgeting.
Keep the maintenance process simple and consistent. Post a daily inspection checklist on the machine, assign responsibility for scheduled servicing, and review records regularly. A maintenance program is effective only when the required tasks are completed and documented reliably.
Key Takeaway: Follow the manufacturer's schedule for lubrication, fluid changes, filter replacement, chain adjustment, and component replacement. Record inspections and repairs to identify recurring problems before they cause extended downtime.
Conclusion
Preventive maintenance is the foundation of reliable trencher performance, and the contractors who make it a daily habit spend far more time cutting trench and far less time waiting on repairs: regular inspection of the cutting chain and teeth keeps the machine biting cleanly into the ground while correct chain tension protects the drive system, and a well-maintained engine with clean oil, filters, cooling components, and fuel delivers steady power for travel and cutting. Careful hydraulic checks catch leaking hoses, worn cylinders, and contaminated fluid before they slow the chain or create a safety hazard, and attention to sprockets, bearings, and moving parts, backed by consistent lubrication, prevents the small failures that can quickly become major breakdowns. End-of-shift cleaning removes the soil, roots, and stones that hide damage and interfere with components, while scheduled service and accurate maintenance records keep every task on time and reveal recurring problems early. When you build these practices into every shift and every project, you protect your equipment investment, keep your crews productive, and deliver dependable results to the customers counting on your schedule, so before your next trenching job, clean and inspect the machine, grease every fitting, check the chain, teeth, and sprockets, confirm your fluids and filters are current, and record the work in your maintenance log.
Frequently Asked Questions
How often should a trencher be maintained?
Complete a pre-operation inspection before every shift to identify visible damage, leaks, loose components, or other problems that could affect performance. Scheduled maintenance should follow the manufacturer's recommended intervals, which are usually based on operating hours and specific service requirements. Dusty, muddy, or demanding working conditions may require more frequent inspections or servicing where recommended by the manual. Keeping accurate maintenance records helps track service needs and identify recurring problems before they cause unexpected downtime.
Why is cutting-chain maintenance important?
Maintaining the cutting chain and keeping its teeth in suitable condition helps preserve digging performance and reduces unnecessary strain on the engine, sprockets, bearings, and drive components. Worn or damaged teeth can slow excavation and make cutting less consistent, especially in compacted ground. Correct chain tension is also essential because excessive slack can cause the chain to slap against the boom or jump the sprocket, while excessive tension can accelerate wear. Inspect and adjust the chain according to the manufacturer's instructions.
What hydraulic problems should operators look for?
Operators should check for leaking hoses, damaged fittings, cylinder leaks, unexpected boom drift, slow or uneven movement, and signs of overheated or contaminated hydraulic fluid. These symptoms may indicate worn seals, damaged components, or other faults that affect machine performance. Never search for a pressurized hydraulic leak with bare hands because escaping fluid can penetrate the skin and cause serious injury. Use cardboard or another suitable method recommended by the manufacturer, and have suspected faults inspected by a qualified technician.
Can cleaning improve trencher reliability?
Yes. Removing accumulated soil, mud, and debris makes inspections easier, keeps grease fittings accessible, and helps prevent material buildup from interfering with moving components. Cleaning also makes it easier to spot cracks, leaks, worn parts, and loose connections before they develop into larger problems. Always shut down the trencher, secure it against unintended movement, and follow the manufacturer's safety procedures before cleaning or reaching near moving components. Avoid directing high-pressure water at electrical parts, seals, or other sensitive components unless approved by the manufacturer.